The Fall Roof Maintenance Checklist Every Idaho Homeowner Needs
Everything Treasure Valley homeowners should check (or have checked) on their roof each fall to avoid ice dams, leaks, and mid-winter emergency calls.
We see the exact same pattern every November across the Treasure Valley. A small maintenance gap becomes a massive headache the minute temperatures drop below freezing. The Fall Roof Maintenance Checklist Every Idaho Homeowner Needs is your primary defense against these seasonal threats.
Deferred maintenance is unforgiving. You will want to catch a dried pipe boot or a lifted shingle before the snow flies.
Our team reviews the latest data, and the 2025 average winter water damage claim reached $10,849. Most of those expensive leaks start from entirely preventable issues.
Let’s examine the common failure points and detail the precise steps to protect your property. We use this exact checklist on every single fall visit under our roof maintenance program.
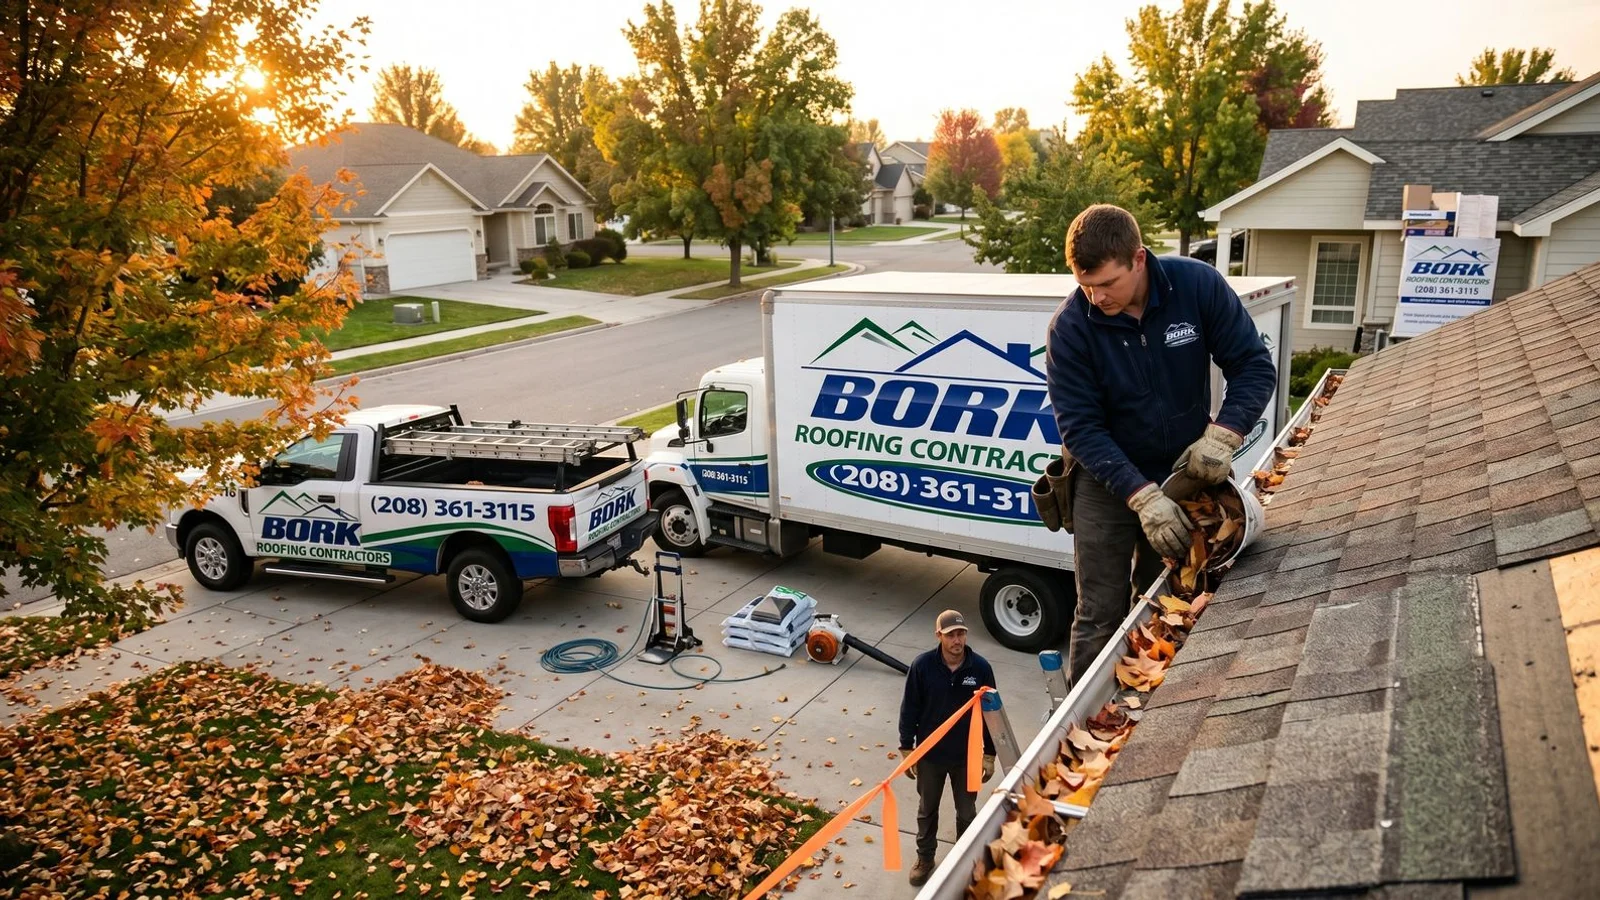
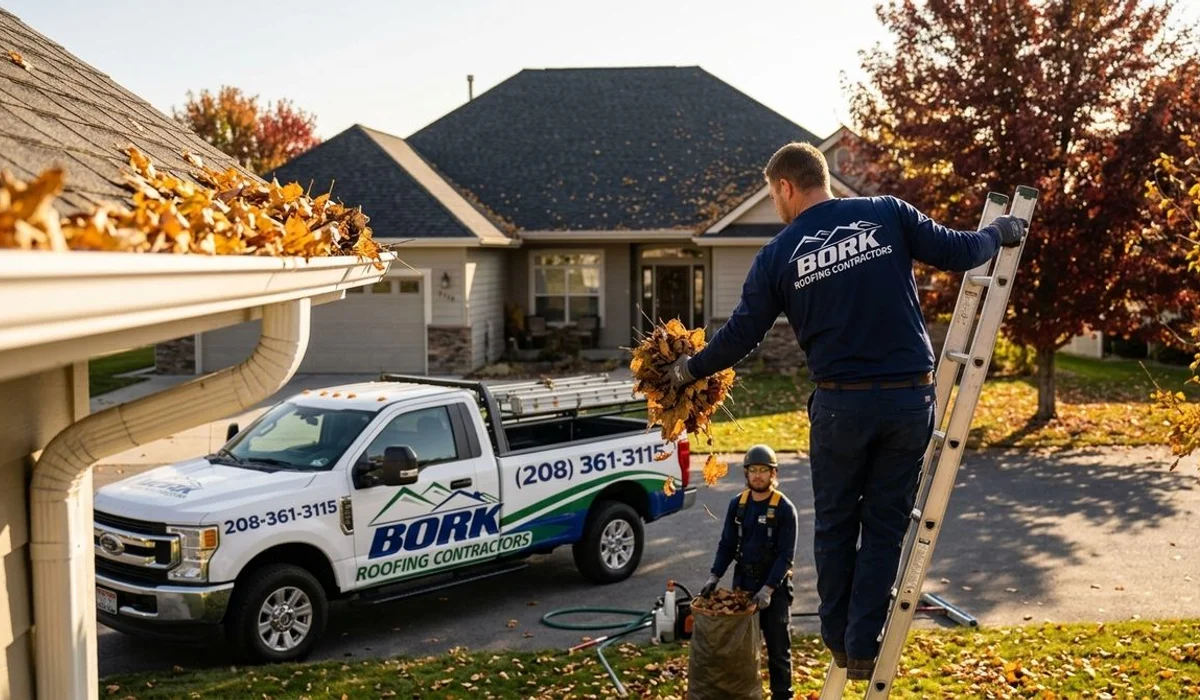
1. Clean the Gutters (Really Clean Them)
Pine needles are the biggest culprit for blocked gutters. Ponderosa and Eastern White Pine needles take 12 to 24 months to decompose.
They contain rigid lignin and form a cross-hatch matting. When winter hits, this mat traps water molecules and freezes solid.
You must watch for these common gutter failure signs:
- Standing water in the gutter channel
- Sagging gutter runs
- Visible pine needle accumulation
- Granule buildup from aging shingles
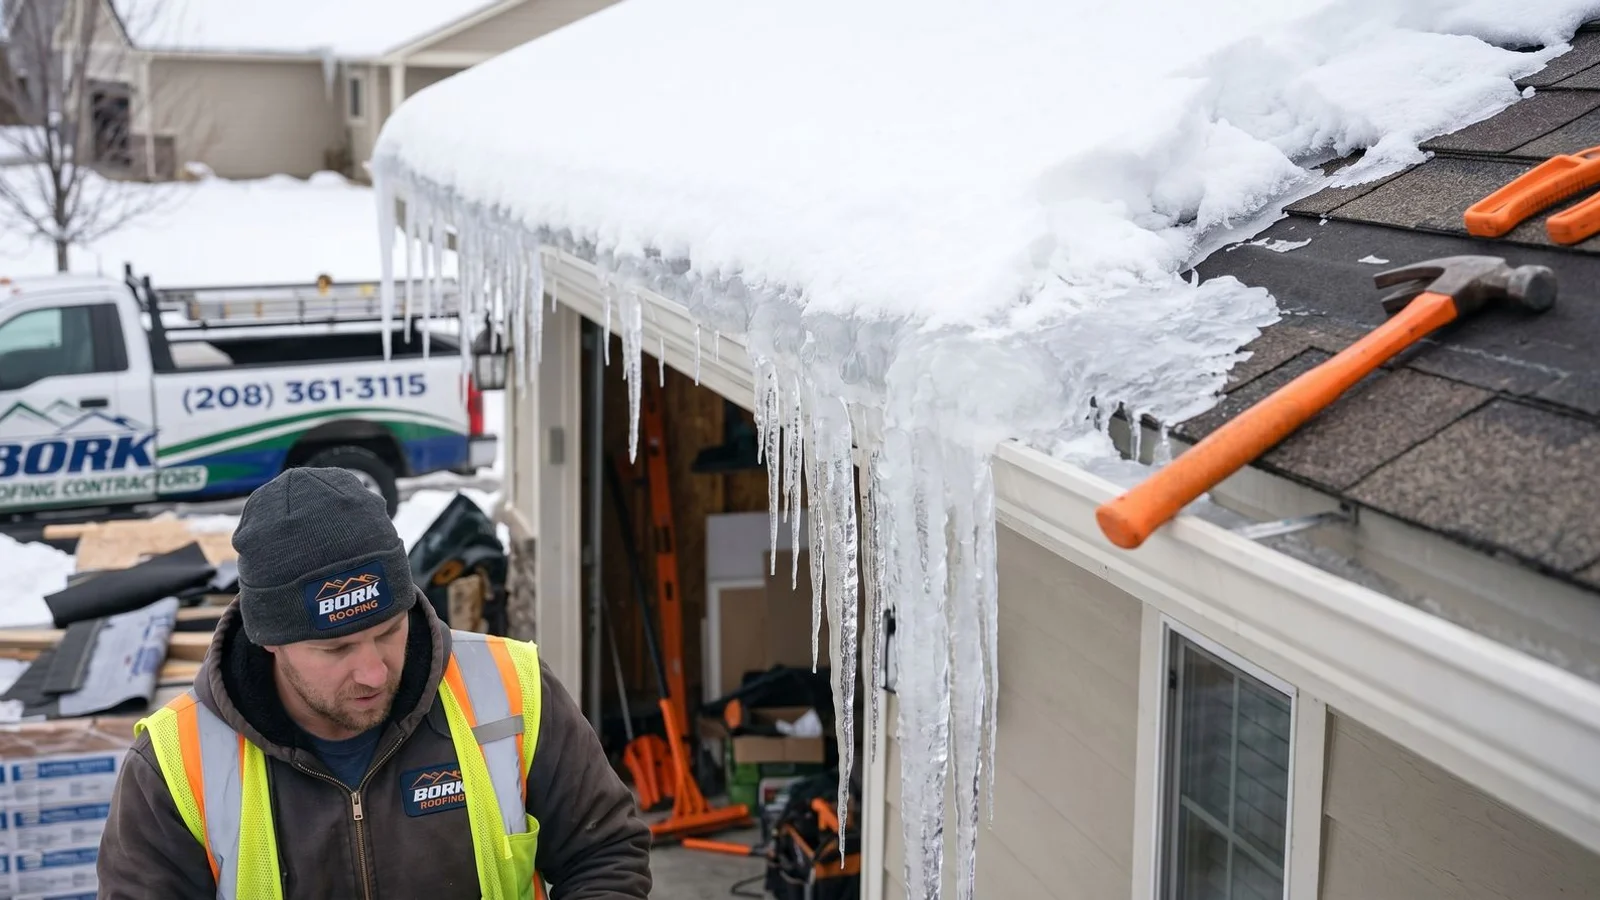
Ice dam season starts right at the gutter. The average professional ice dam removal costs $1,200 according to 2026 HomeAdvisor data, and steam removal can exceed $2,400.
We highly recommend clearing gutters by hand or with proper vacuum equipment. A simple hose rinse will not break apart saturated needle mats.
Check downspouts closely. A clear gutter with a clogged downspout is just as bad as a clogged gutter.
2. Inspect All Pipe Boots
Pipe boots are Idaho’s leading winter leak source. You must walk around the exterior with binoculars and look at every plumbing vent pipe.
Our technicians see standard rubber boots fail years before the actual shingles do. The sun bakes the neoprene rubber until it cracks.
Rubber boots typically last only 7 to 15 years. A 30-year architectural shingle roof will easily outlive the original vent seal.
| Boot Material | Average Lifespan | Best Use Case |
|---|---|---|
| Standard Rubber (Neoprene) | 7 to 15 Years | Budget repairs or temporary fixes |
| UV-Resistant Silicone | 15 to 25 Years | Long-term residential application |
| Lead Jacks | 30 to 50+ Years | Permanent lifetime solutions |
Replacing these with a UV-resistant silicone option like the Ultimate Pipe Flashing from Lifetime Tool is a permanent fix. If the boot is just starting to show surface wear, you can add a compression donut sleeve.
This cheap fix can extend the watertight seal for another 5 to 10 years.
3. Check Flashing at All Penetrations
Your roof has multiple vulnerable joints. Chimney flashing, skylight flashing, wall flashing, and vent collars all need regular attention.
Look for any rust, gaps, or visible sealant failure. These micro-cracks expand and contract violently during Treasure Valley freeze-thaw cycles.
We constantly find cheap caulk smeared over failing metal joints. Standard silicone will simply peel away after a few months of weather exposure.
“Replacing step and counter flashing costs significantly less than a $10,849 water damage restoration project.”
Always prioritize proper metal repairs over quick chemical fixes.
4. Look for Lifted or Damaged Shingles
High winds frequently sweep through Idaho during the seasonal transitions. Wind gusts hitting 40 to 60 mph will test the sealant strips on your roofing system.
Scan the ridge caps and eaves carefully from the ground. Are any shingles sitting up rather than lying flat?
High-Risk Shingle Zones
Pay special attention to these vulnerable areas:
- Exposed ridge caps
- Overhanging eaves
- Valley intersections
- Edges facing prevailing winds
Missing shingles leave the roof deck completely exposed to moisture. You need to get these replaced immediately.
Fall is the absolute final window before they turn into major water intrusion under a heavy snow load.
5. Trim Overhanging Tree Branches
Any branches touching or within 6 feet of the roof should come down. Arborists follow the ANSI A300 pruning standards to ensure the tree remains healthy while protecting the structure.
We respond to dozens of Treasure Valley emergency calls every single winter. Homeowners often say it was just a small branch before the storm hit.
Wet, packed snow adds massive weight to limbs. A two-foot accumulation of wet snow can easily snap an overhanging pine bough directly onto your roof deck.
“A small branch becomes a heavy battering ram under a winter snow load.”
Clear those branches now to avoid emergency tree removal fees in January.
6. Check Attic Insulation Depth
Attic insulation is absolutely critical to preventing ice dams. Heat escaping upward melts the snow unevenly on the roof.
The melted water runs down to the cold eave and freezes solid. The 2020 Idaho Energy Conservation Code requires a minimum of R-49 insulation in the attic.
Many older Meridian homes still have R-30 or less.
Reaching the R-49 Target
You need specific material depths to hit that R-49 rating:
- Blown-in Fiberglass: Requires approximately 19.5 inches of depth.
- Blown-in Cellulose: Requires between 13.5 and 16 inches.
- Fiberglass Batts: Requires multiple layers stacked perpendicular to the joists.
Our crews use a simple tape measure to check the existing depth. If the insulation sits lower than the floor joists, you are losing expensive heat.
7. Verify Ventilation Airflow
Ventilation works hand-in-hand with insulation to keep the roof deck cold. You must check the soffit vents from the exterior.
Watch for these common airflow blockers:
- Blown-in insulation covering soffit intakes
- Multiple layers of exterior paint sealing the vent holes
- Pine needles packed into the ridge vent
- Bird or wasp nests in the gable vents
We highly recommend installing ventilation baffles like Durovent. These simple plastic chutes ensure your blown-in insulation never suffocates the intake airflow.
Balanced Net Free Area (NFA) airflow is essential year-round. It is the primary mechanical defense against winter ice dams.
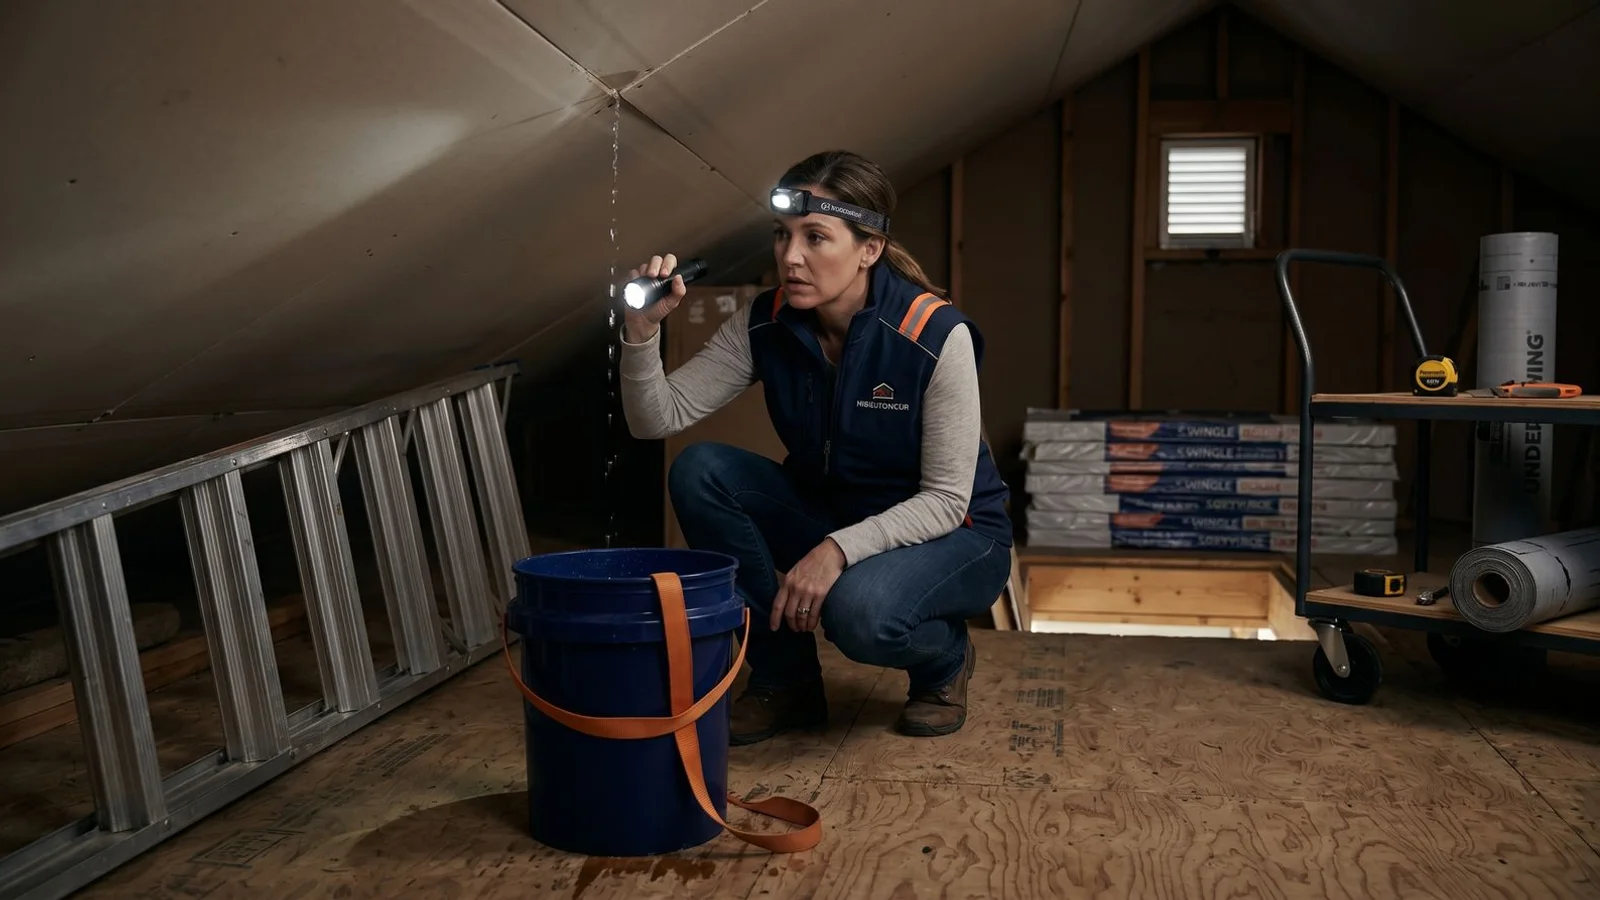
8. Inspect the Attic for Moisture
Get up into the attic space with a bright flashlight. You are looking for any signs of elevated relative humidity.
Our inspection process always includes a check for water staining along the eaves. Past ice dam intrusion leaves distinct watermarks on the exterior framing.
Check for these specific moisture indicators:
- Frost buildup on exposed roofing nail tips
- Black moisture stains on the wood decking
- Watermarks running down the interior walls
- Matted or compressed insulation patches
These signs indicate a severe condensation problem that will rot your roof deck from the inside out.
9. Re-Seal Any Questionable Penetrations
Small sealant touch-ups before winter act as cheap insurance. You must use a proper professional-grade roofing sealant for this job.
Avoid standard hardware store silicone caulk at all costs. It lacks the flexibility to survive extreme temperature swings.
We use premium polyurethane sealants like Loctite PL Roof and Flashing or Sikaflex NP1. These products feature a ±25% movement capability to flex with the building.
“Sealant is only for minor touch-ups. It is never a permanent fix for fundamentally damaged or rusted flashing.”
Use the right product to ensure the seal survives the first hard freeze.
10. Schedule a Professional Inspection
A roof older than ten years requires trained eyes. Finding issues early is always cheaper than repairing a catastrophic failure.
According to the National Roofing Contractors Association (NRCA) guidelines, regular maintenance significantly extends the life of a roof system.
A professional inspection typically covers:
- Advanced moisture detection in the attic
- Drone or close-up analysis of shingle granule loss
- Sealant integrity tests on all penetrations
- Structural evaluation of the roof deck
Our inspectors spot micro-cracking and hidden flashing failures before they leak. An inspection costs a fraction of a single emergency repair call in February.
The Bork Maintenance Program
Our annual maintenance program is priced specifically around this exact fall checklist. The team handles everything listed above plus a professional sealant refresh.
You receive a comprehensive written report and warranty compliance documentation. The single annual fee ranges from $295 to $595, depending entirely on your roof size.
Program Benefits
Enrolling in the maintenance program offers direct advantages:
- Priority scheduling for winter emergencies
- Detailed warranty compliance reports
- Complete gutter and roof surface clearing
- Professional-grade sealant applications
Call (208) 361-3115 to enroll or schedule a one-time fall inspection before the first hard freeze hits Idaho. Ensure your roof is ready.
Mastering The Fall Roof Maintenance Checklist Every Idaho Homeowner Needs
You cannot ignore the harsh reality of winter weather. Regular maintenance prevents catastrophic structural failures.
Take action today to secure your property.
Review these steps and call our team to schedule your fall inspection. The Bork Maintenance Program is designed to keep your home safe all winter.